
A piano has 88 keys, but each hand only has 5 fingers. That’s why finger numbers (1–5) and fingering matter so much.
Understanding proper fingering brings real benefits — it becomes easier to play and boosts your expression, among other things.
Here’s piano finger-movement knowledge you can put to use starting today.
If you’re not sure where to tuck your thumb under, we’ve placed a tool that shows fingering on the keyboard partway through this article. It displays finger numbers for scales in all 12 keys directly on the keyboard, and you can play through them one note at a time.
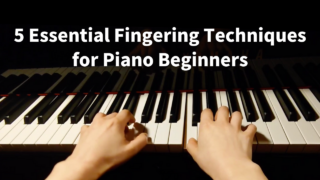
If you’d rather start with the fundamentals — hand shape, how the fingers move — read 5 Fingering Techniques Every Piano Beginner Should Learn First before this one.
- Finger Number Basics: 1–5, From Thumb to Pinky
- Thumb-Tuck & Finger-Crossover Basics – Playing C-D-E-F-G-A-B-C Smoothly
- Fingering Tool: Check Thumb-Tuck Positions on the Keyboard
- 5 Rules for Piano Fingering
- How Is Left-Hand Fingering Different from the Right?
- Scale Fingering for All 12 Keys — Reference Table
- Why Finger Numbers and Fingering Are the Shortcut to Improvement
- What Happens If You Ignore Finger Numbers
- How to Decide on the Right Fingering
- What to Do When You Don’t Know the Finger Number
- When It’s Okay to “Ignore” Finger Numbers
- “Fingering Training” for Piano Improvement
- FAQ
- Understand Finger Numbers and Improve Your Piano Playing!
Finger Number Basics: 1–5, From Thumb to Pinky

Finger numbers run 1 through 5 starting from the thumb. It’s the same for both hands.
- 1 = Thumb
- 2 = Index finger
- 3 = Middle finger
- 4 = Ring finger
- 5 = Pinky (little finger)
A common starting point for beginners is placing both thumbs (1) near middle C.
Use the video and sheet music above as a reference, and practice while memorizing the basic finger numbers.
Where Are Finger Numbers Written on Sheet Music?
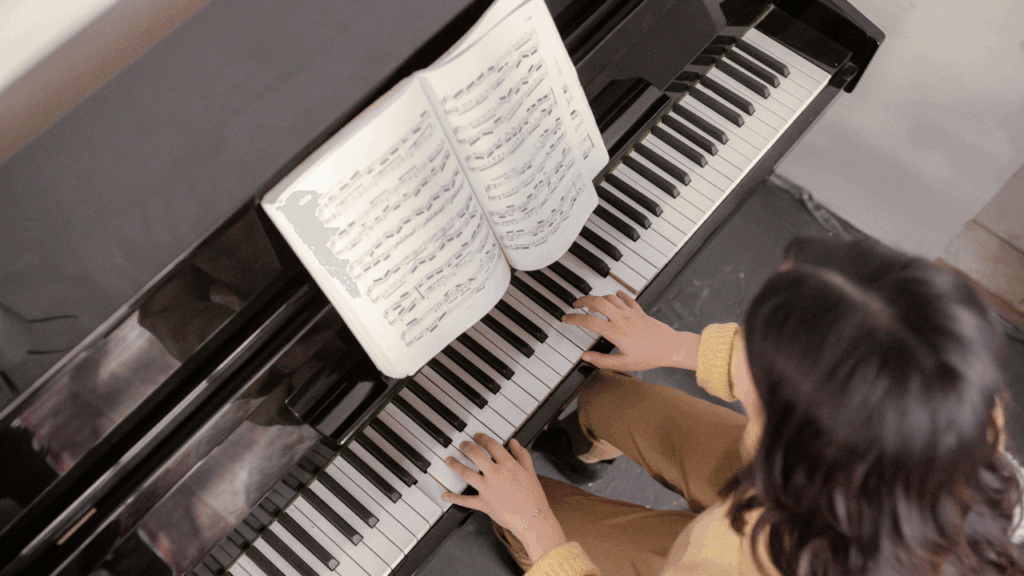
Finger numbers on sheet music appear as small digits right above or below the note. A number on a note in the right-hand part (upper staff, treble clef) refers to a right-hand finger; a number on a note in the left-hand part (lower staff, bass clef) refers to a left-hand finger.
Numbers are usually marked only at spots where you’re likely to hesitate — not on every single note. Notes without a number are designed so that simply moving on from the previous finger connects naturally.
In music like scales, where one hand’s line crosses between the upper and lower staff, the number’s position alone can make it hard to tell which hand it belongs to. In that case, check the direction of the note stems or the slur connections to see which hand’s line it follows.
Thumb-Tuck & Finger-Crossover Basics – Playing C-D-E-F-G-A-B-C Smoothly
Each hand has only 5 fingers, so an 8-note scale doesn’t have enough to go around. That’s where you need to tuck the thumb under another finger (thumb tuck), or cross another finger over the thumb (finger crossover), partway through.
This one spot is where almost everyone gets stuck when practicing scales. Once you know exactly where to tuck the thumb under, the rest is just lowering your fingers in order.
Right Hand, Ascending
“C 1” → “D 2” → “E 3” → thumb tucks under → “F 1” → “G 2” → “A 3” → “B 4” → “C 5” ↓
Right Hand, Descending
“C 1” ← “D 2” ← “E 3” ← finger crosses over ← “F 1” ← “G 2” ← “A 3” ← “B 4” ← “C 5”
Left Hand, Ascending
The left hand starts on the pinky (5), and the thumb tucks under at E. It’s a mirror image of the right hand.
“C 5” → “D 4” → “E 3” → “F 2” → “G 1” → finger crosses over → “A 3” → “B 2” → “C 1” ↓
Left Hand, Descending
“C 5” ← “D 4” ← “E 3” “F 2” ← “G 1” ← thumb tucks under ← “A 3” ← “B 2” ← “C 1”
Fingering Tool: Check Thumb-Tuck Positions on the Keyboard
Text and numbers alone can make it hard to picture the exact moment the thumb tucks under. The tool below shows finger numbers on the keys you press, and marks where thumb tucks and finger crossovers happen with an arc drawn right on the keyboard.
- Choose a key: sharp keys on top, flat keys on the bottom. All 12 keys are supported.
- Choose a hand: right, left, or both. With both hands, the keyboard shows two rows — the top row for the right hand, the bottom for the left.
- One note at a time: each button press advances by one note. Try pausing right before a thumb tuck to check your hand shape.
- Pauses at tucks and crossovers: during autoplay, it pauses briefly right before each transition.
A note with a circled finger number is where the thumb tuck or finger crossover lands. It carries the same meaning as the marking you’ll see on sheet music, so you can practice while comparing it directly to your score.
5 Rules for Piano Fingering
Fingering varies with the piece and the size of your hand, but a few rules hold true across every method book. When in doubt, come back to these five.
- The thumb belongs on white keys
Black keys sit farther back, so playing one with the short thumb pushes your whole hand back and out of reach for the other fingers. Scale fingerings are built so the thumb always lands on a white key. - Don’t use the same finger twice in a row
Playing adjacent notes with the same finger always breaks the sound. The more you want a smooth connection, the more important it is to switch fingers. - Use the pinky (5) at the edges
The high end for the right hand, the low end for the left. The pinky is naturally weak, so using it in the middle of a passage tends to make the notes uneven. - Descending mirrors ascending
A scale’s fingering going down is the exact reverse of going up. Learn one direction, and the other is already decided. - Keep hand movement to a minimum
A fingering that keeps your wrist moving as little as possible, staying in one place longer, holds up better even at speed.
The finger numbers shown in the tool above satisfy all five of these rules. Use them as a guide when you’re wondering, “why this finger, here?”
What’s covered here are the rules for deciding which finger to use. For the more fundamental question of how the fingers themselves should move — hand shape, relaxing your muscles, and so on — see 5 Fingering Techniques Every Piano Beginner Should Learn First. Often the real problem isn’t the finger number at all, but how you’re using your hand.
How Is Left-Hand Fingering Different from the Right?
A lot of people get stuck on left-hand finger numbers, and the reason is clear: the numbers run in the opposite direction from the right hand.
For the right hand, the number goes up as the pitch rises (C 1 → D 2 → E 3). For the left hand, moving in the same direction makes the number go down (C 5 → D 4 → E 3). Going from a low note to a high note, the right hand moves away from the thumb, while the left hand moves toward it.
That’s why thumb tucks and finger crossovers swap sides too. Ascending a C major scale, the right hand’s thumb tucks under between E and F, while the left hand’s middle finger crosses over the thumb between G and A.
- Right hand, ascending: the thumb tucks under between E and F
- Left hand, ascending: the middle finger crosses over between G and A
- Right hand, descending: the middle finger crosses over between F and E
- Left hand, descending: the thumb tucks under between A and G
Select “Left Hand” in the tool above and you’ll see the arc appear at this spot. Switching back and forth between right and left hand makes the mirror-image relationship easy to grasp.
Scale Fingering for All 12 Keys — Reference Table
Once you can play C major, branch out into the other keys. Below are the finger numbers for one octave ascending (descending is the exact reverse). Bold marks the note where the thumb tucks under or a finger crosses over.
| Key | Notes (ascending) | Right Hand | Left Hand |
|---|---|---|---|
| C major | C D E F G A B | 1-2-3-1-2-3-4-5 | 5-4-3-2-1-3-2-1 |
| G major | G A B C D E F♯ | 1-2-3-1-2-3-4-5 | 5-4-3-2-1-3-2-1 |
| D major | D E F♯ G A B C♯ | 1-2-3-1-2-3-4-5 | 5-4-3-2-1-3-2-1 |
| A major | A B C♯ D E F♯ G♯ | 1-2-3-1-2-3-4-5 | 5-4-3-2-1-3-2-1 |
| E major | E F♯ G♯ A B C♯ D♯ | 1-2-3-1-2-3-4-5 | 5-4-3-2-1-3-2-1 |
| B major | B C♯ D♯ E F♯ G♯ A♯ | 1-2-3-1-2-3-4-5 | 4-3-2-1-4-3-2-1 |
| G-flat major | G♭ A♭ B♭ C♭ D♭ E♭ F | 2-3-4-1-2-3-1-3 | 4-3-2-1-3-2-1-2 |
| D-flat major | D♭ E♭ F G♭ A♭ B♭ C | 2-3-1-2-3-4-1-2 | 3-2-1-4-3-2-1-2 |
| A-flat major | A♭ B♭ C D♭ E♭ F G | 2-3-1-2-3-1-2-3 | 3-2-1-4-3-2-1-2 |
| E-flat major | E♭ F G A♭ B♭ C D | 2-1-2-3-4-1-2-3 | 3-2-1-4-3-2-1-2 |
| B-flat major | B♭ C D E♭ F G A | 2-1-2-3-1-2-3-4 | 3-2-1-4-3-2-1-2 |
| F major | F G A B♭ C D E | 1-2-3-4-1-2-3-4 | 5-4-3-2-1-3-2-1 |
In flat keys, since the thumb can only land on white keys, some keys need the thumb to tuck under twice per octave. For B-flat major, right hand, that happens at B♭→C and E♭→F. It looks complicated as numbers alone, but switch keys in the tool above and you can see exactly how many arcs there are and where, at a glance.
For the note order and key signature of each key, also see the full scale reference chart.
Why Finger Numbers and Fingering Are the Shortcut to Improvement

Beginner sheet music and method books often include finger numbers, and ignoring them can leave you running out of fingers partway through or unable to play smoothly, with the sound cutting out — among other problems.
Pushing ahead your own way without understanding how the fingers should move will always hit a wall eventually, so especially at the start, follow the finger numbers as you practice and let your body learn the right movements.

What Happens If You Ignore Finger Numbers

Harder to play: with the wrong finger number, you may end up twisting your wrist trying to force it, or hit a dead end where you simply can’t reach the next note.
Limits musical expression: a poorly executed thumb tuck breaks the sound into disconnected fragments, and you lose the ability to express the music.
Can’t play fast: fingering with a lot of hand movement always falls apart once you push the tempo. If you can play it slowly but stumble at speed, it’s worth reconsidering your fingering.
How to Decide on the Right Fingering

- Study the pattern: identify whether it’s a leap, a scale, an arpeggio, or some other shape.
- Minimize movement: look for a fingering that reduces wrist movement and keeps your hand in one place longer.
- The thumb belongs on white keys: play black keys with one of the longer fingers instead. There are exceptions.
- Avoid repeating the same finger: switch fingers for a run of adjacent notes.
- Check by phrase: confirm it flows smoothly across the surrounding measures, not just one bar in isolation, and write it into the score if needed.
What to Do When You Don’t Know the Finger Number
- Match it to a scale pattern
Most note patterns are part of some scale. If you know that key’s scale fingering, you can work out the spots that aren’t marked. Try looking it up with the tool above. - Check a study piece
Standard études like Hanon and Czerny come with an established fingering. If you’re unsure, search for a similar pattern. - Use a professional’s score as a model
Published scores and your teacher’s own fingering are both good things to learn from. - Try an alternative on purpose
Finger numbers vary from person to person, so it’s fine to experiment with a different option.
When It’s Okay to “Ignore” Finger Numbers

If your hands are unusually small or large, you may not be able to play exactly as the printed finger numbers say — in that case, you’ll need to work out a fingering that suits you.
Which fingers move easily, and fingering preferences generally, also differ from person to person, so look for the finger movements that work for you.
Just always make sure to check, across the whole phrase, that the sound stays smooth and that nothing feels forced on your fingers or body.
“Fingering Training” for Piano Improvement

If your fingers still won’t move the way you want even after learning the finger numbers, you need to practice the fingering movements themselves. Along with 5 Fingering Techniques, try making these four a daily habit.
- Stretching: within a comfortable range, bend each finger back and spread them apart to relax.
- Hanon: trains independent movement of each finger.
- Scales and arpeggios: start slow and gradually raise the tempo. Play with an ear toward keeping every note even.
- Check one hand at a time, “one note at a time”: before raising the tempo, confirm your hand has really learned where the thumb tucks under. The “One note at a time” mode in the fingering tool is useful for this.
FAQ
-1024x684.png)
Q1 Do I have to follow finger numbers exactly?
A Not necessarily. The underlying principle is efficiency, so you can adjust them to fit your hand size or the piece.
That said, for beginners, learning to move your fingers exactly as printed is the fastest route to improvement.
Q2 Is it forbidden to play black keys with the thumb?
A There’s no rule against it — depending on the situation, the thumb does sometimes play black keys.
But keep in mind that using the thumb pushes it back and out of reach of the other fingers, so as a general rule, black keys are played with fingers other than the thumb.
Q3 How do I read sheet music with no finger numbers written in?
A Recall the fingering from a similar pattern you already know, and try playing it that way.
If it’s hard to play, try watching a performance video to see the pianist’s hands, ask your piano teacher, or just experiment with your own hands.
Q4 I can’t remember left-hand finger numbers
A It helps to keep in mind that the numbers run in the opposite direction from the right hand. Moving from a low note to a high note, the right hand’s numbers go up while the left hand’s go down.
Where the thumb tucks under also differs between the hands. Ascending C major, it’s between E and F for the right hand, and between G and A for the left. Try switching hands in the fingering tool to compare them.
Q5 Do I have to memorize the finger numbers for every scale?
A You don’t need to learn all 12 keys at once. The usual approach is to start with C major, then move to F major and G major, expanding from the keys with more white keys.
What you actually need to memorize isn’t a string of digits — it’s which note the thumb lands on. Once the thumb’s position is set, the rest of the fingers fall into place naturally.
Q6 What’s the difference between a “thumb tuck” and a “finger crossover”?
A A thumb tuck is when the thumb passes under another finger; a finger crossover is when another finger passes over the thumb. They’re the same motion happening at the same spot — just named differently depending on which direction you’re moving.
For the right hand, ascending is a thumb tuck and descending is a finger crossover. For the left hand, it’s the reverse.
Understand Finger Numbers and Improve Your Piano Playing!
- Ignoring finger numbers just means the long way around, so especially as a beginner, let your body learn them.
- The keys to choosing correctly: “minimize movement,” “avoid repeating the same finger,” and “keep thumb tucks and finger crossovers smooth.”
- The left hand’s numbers run opposite to the right hand’s, and where the thumb tucks under swaps too.
- Start by playing a smooth C-D-E-F-G-A-B-C.
At first, just keeping track of the numbers may take all your concentration, but the more you keep at it, the more your fingers learn the keyboard on their own.
Use the approach introduced here to build a fingering that works for you, and enjoy the freedom to express yourself at the piano!